Creating a repository
Creating a repository requires the Artifact Store Owner role on the project (or equivalent inherited permissions).
1
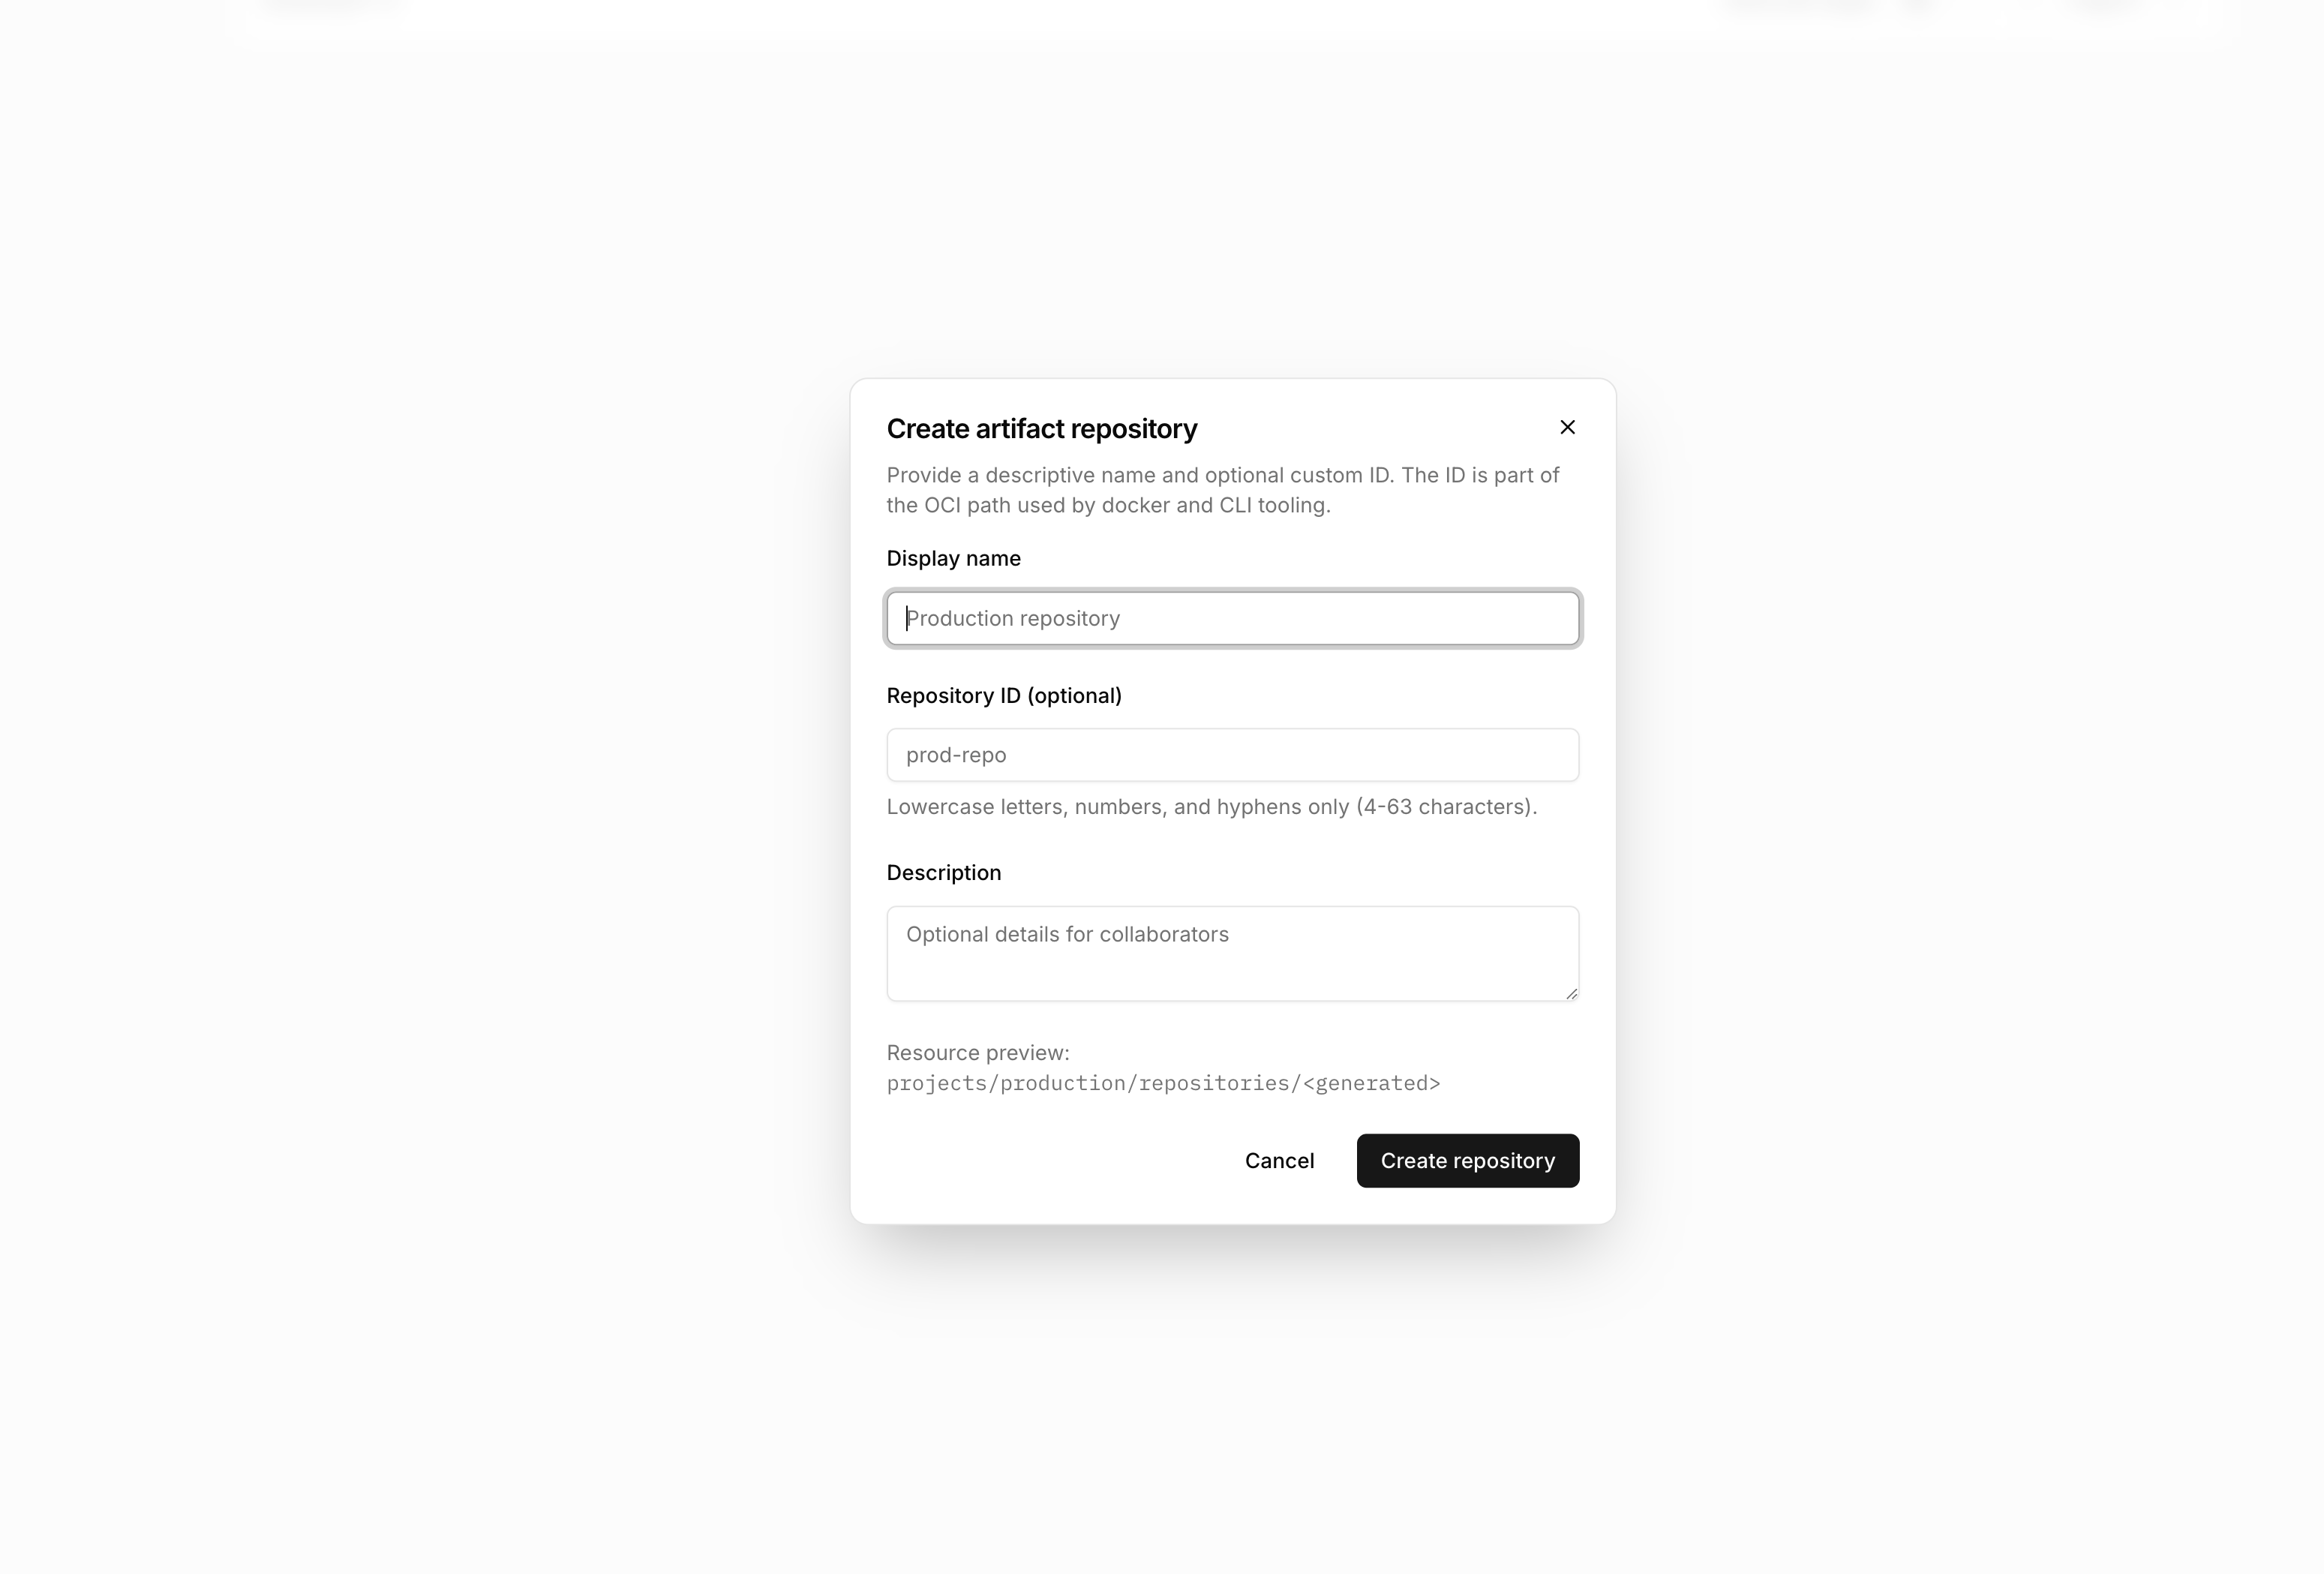
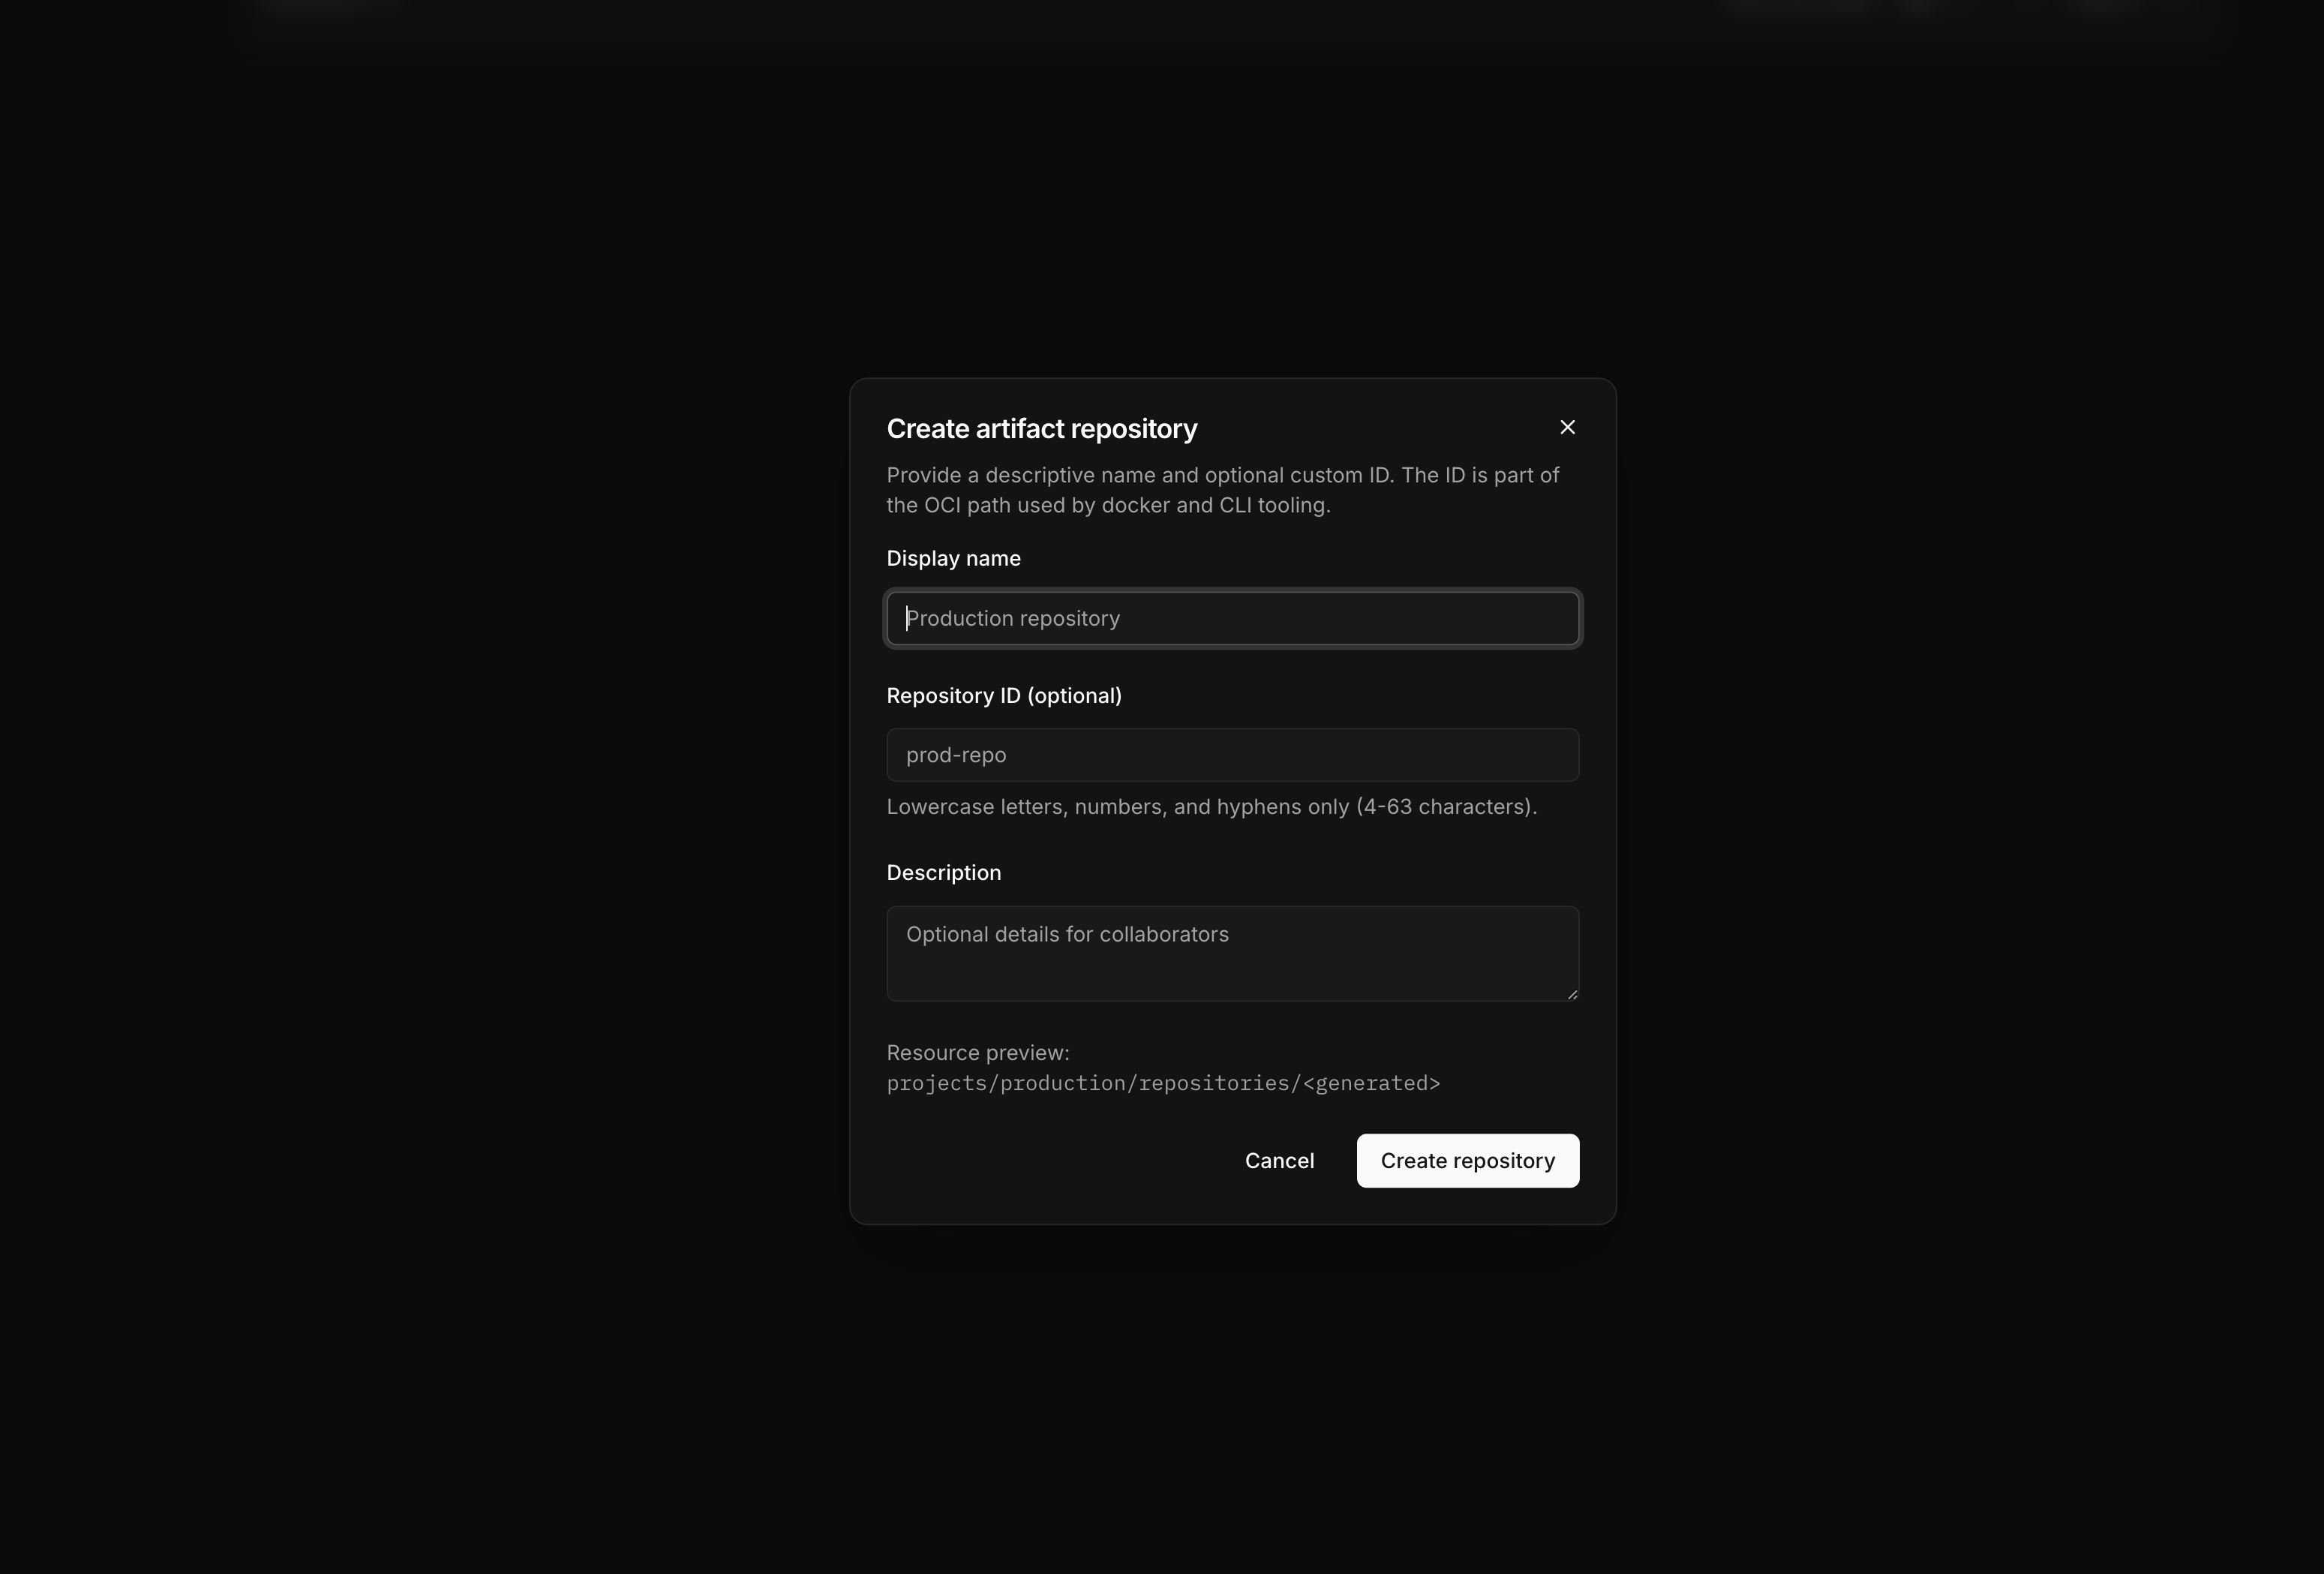
Enter repository details
Provide a display name. Optionally specify a custom ID—if omitted, the system generates one automatically.
2
Configure scanning
Enable vulnerability scanning if you want automatic security analysis of pushed images.
3
Create
Submit the form. The new repository is ready to receive images.
Browsing images
Open a repository to view its contents. The image list shows all OCI images stored in the repository.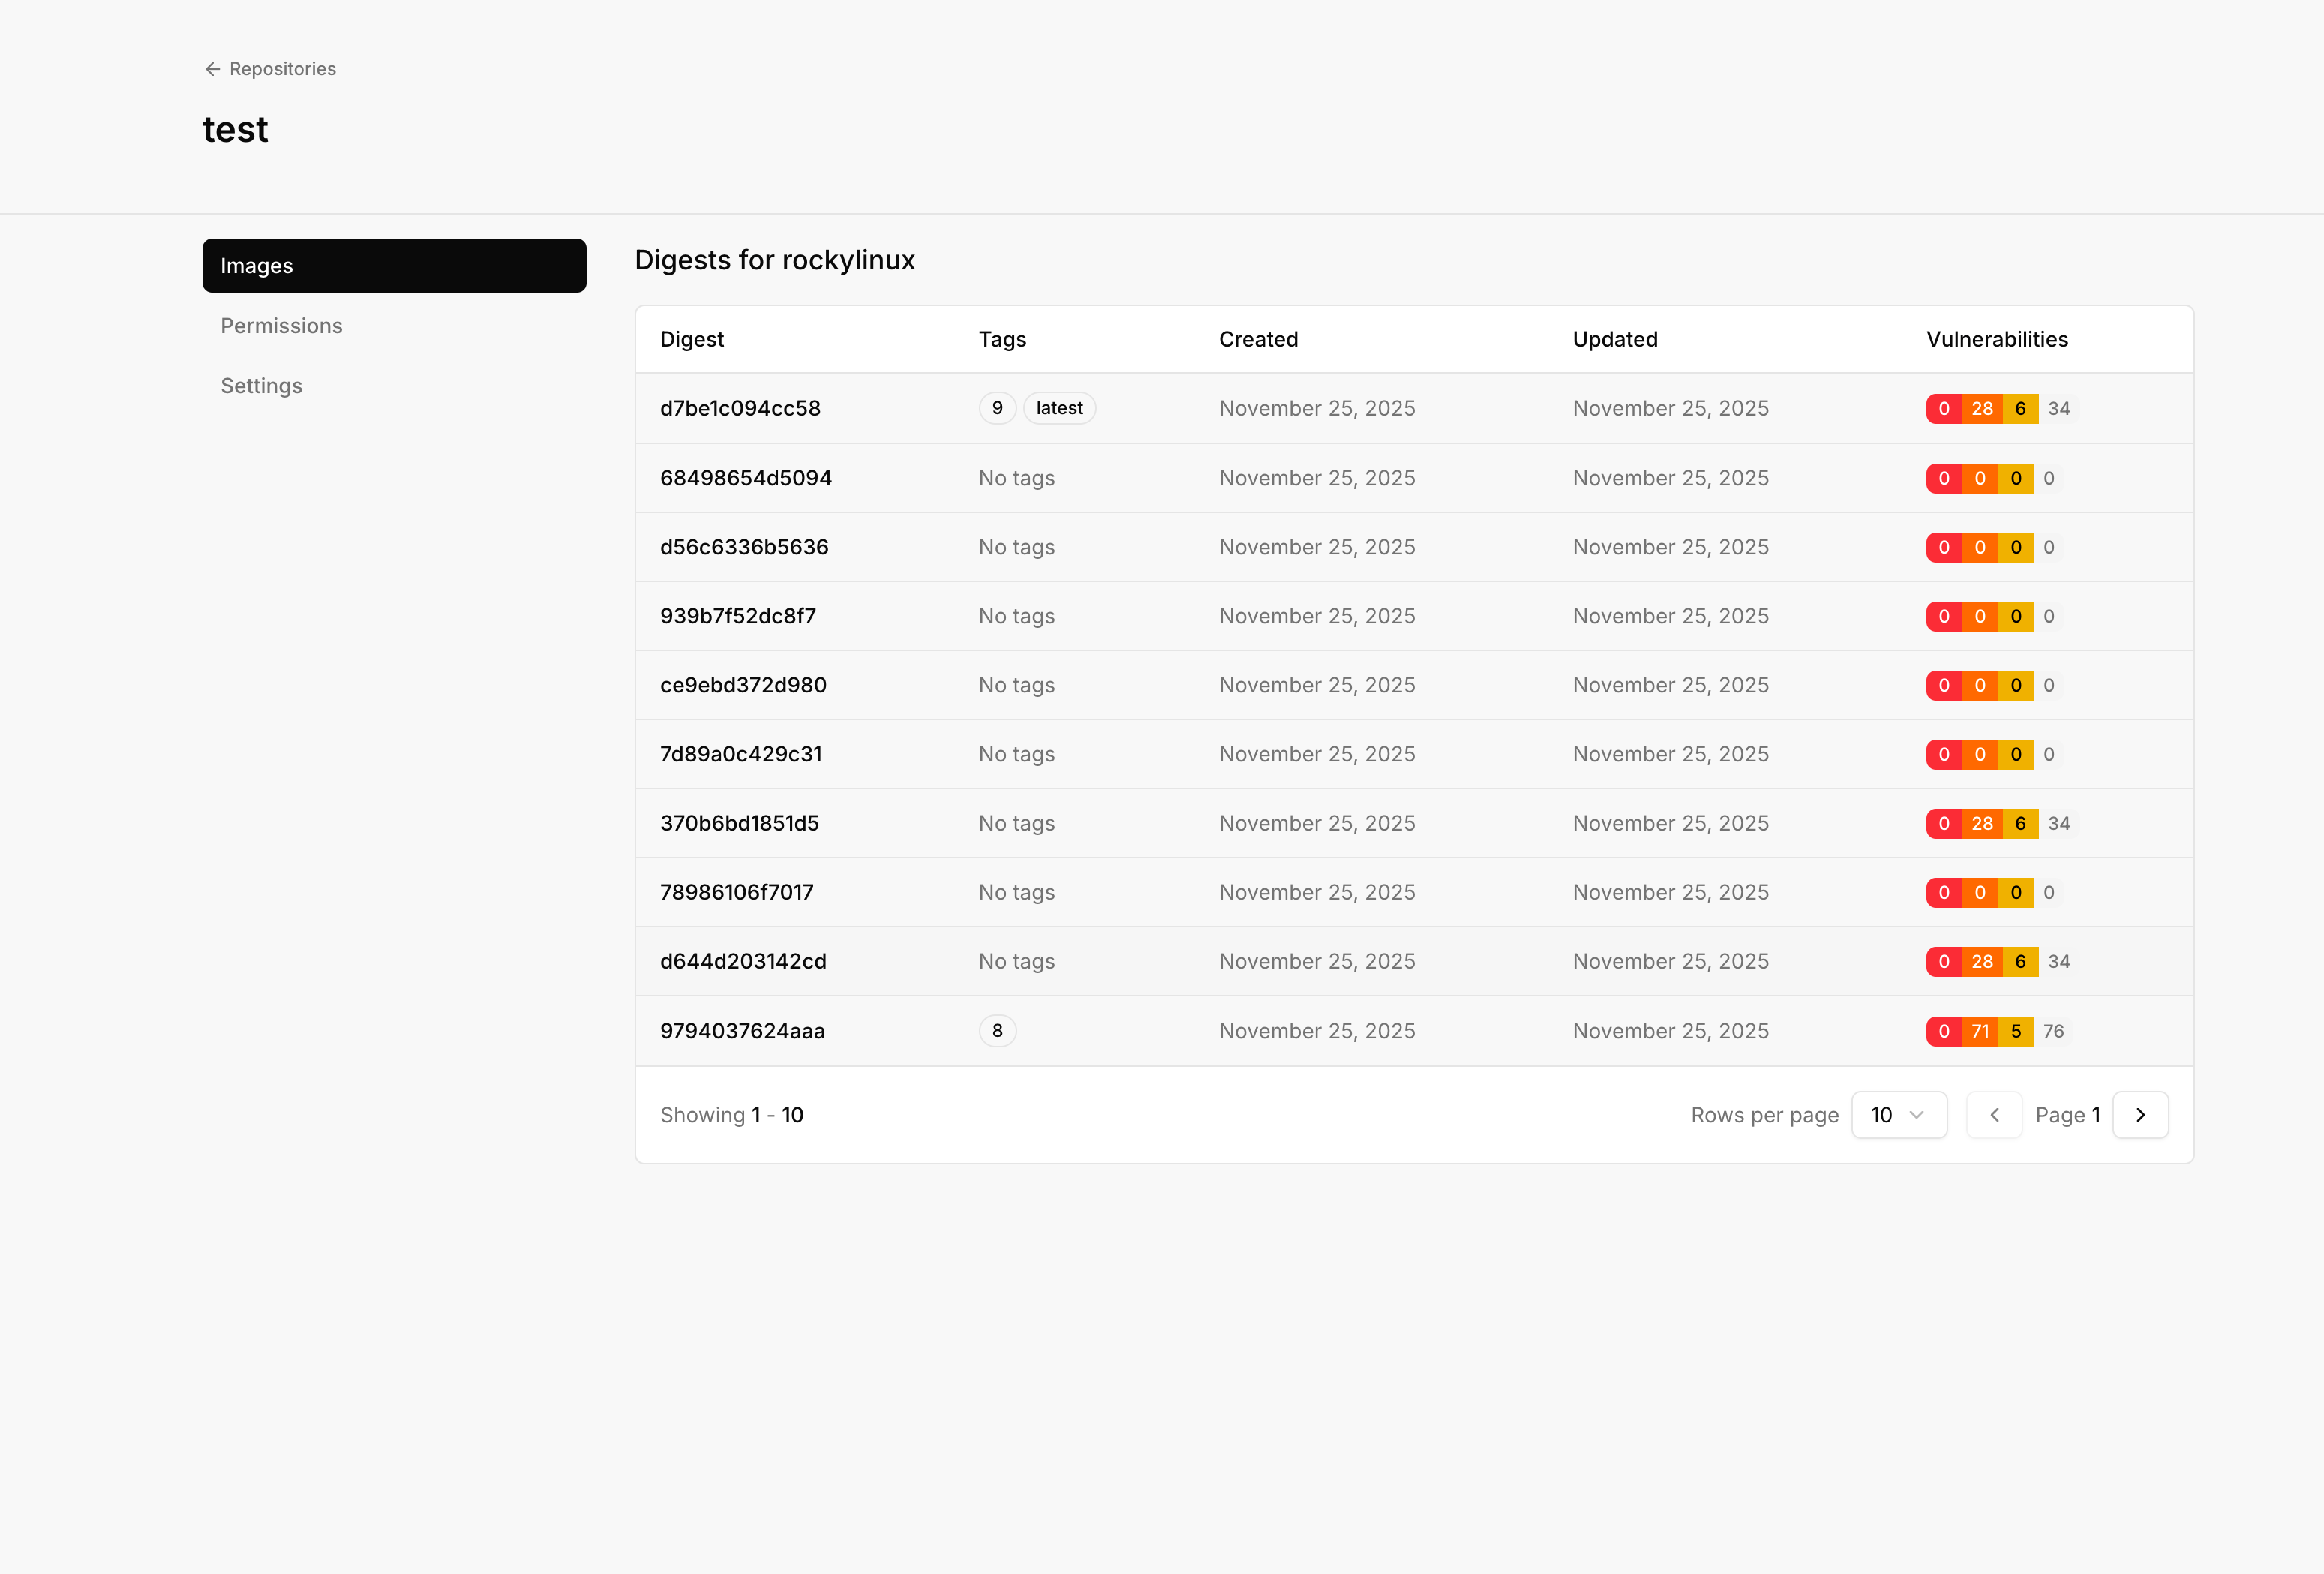
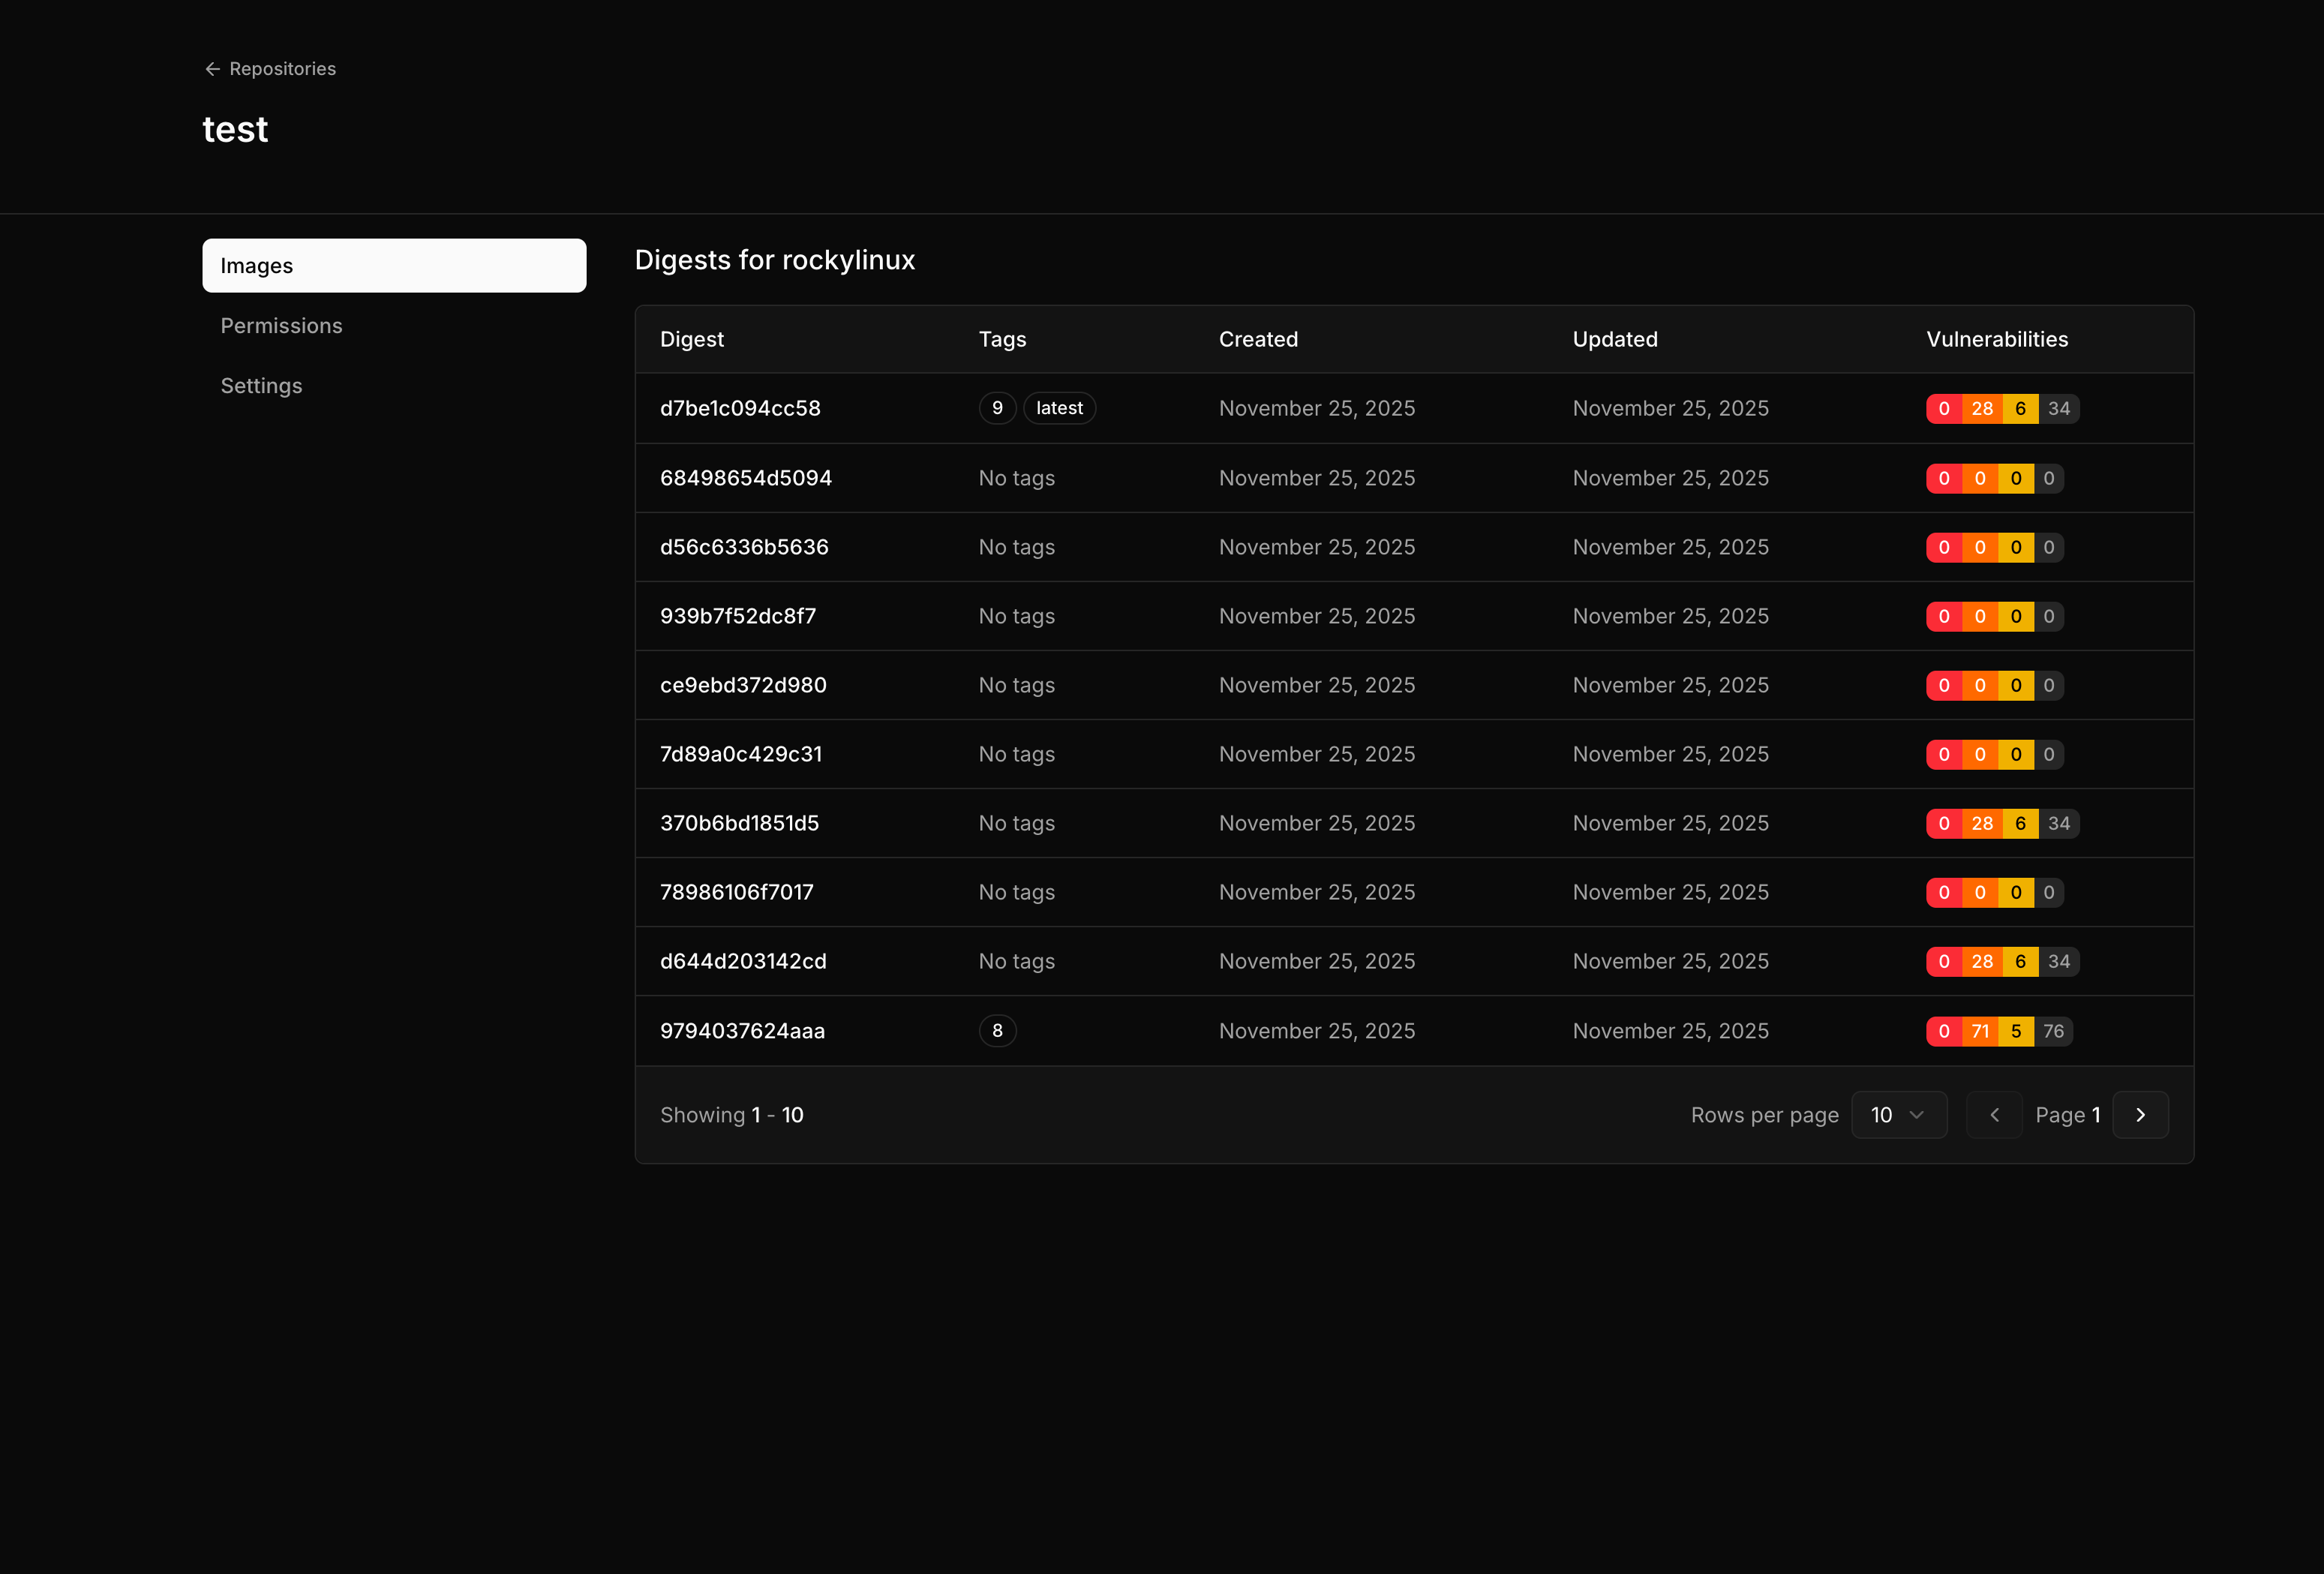
- Tags pointing to this digest
- Size of the image
- Created time
- Vulnerability summary (if scanning is enabled)
Vulnerability scanning
When enabled, the Artifact Store automatically scans pushed images for known vulnerabilities using Trivy.Enabling scanning
Scanning is configured per repository. When creating a repository, enable the scanning option. For existing repositories, edit the repository settings to toggle scanning.Viewing scan results
Navigate to a specific image digest to view its vulnerability report.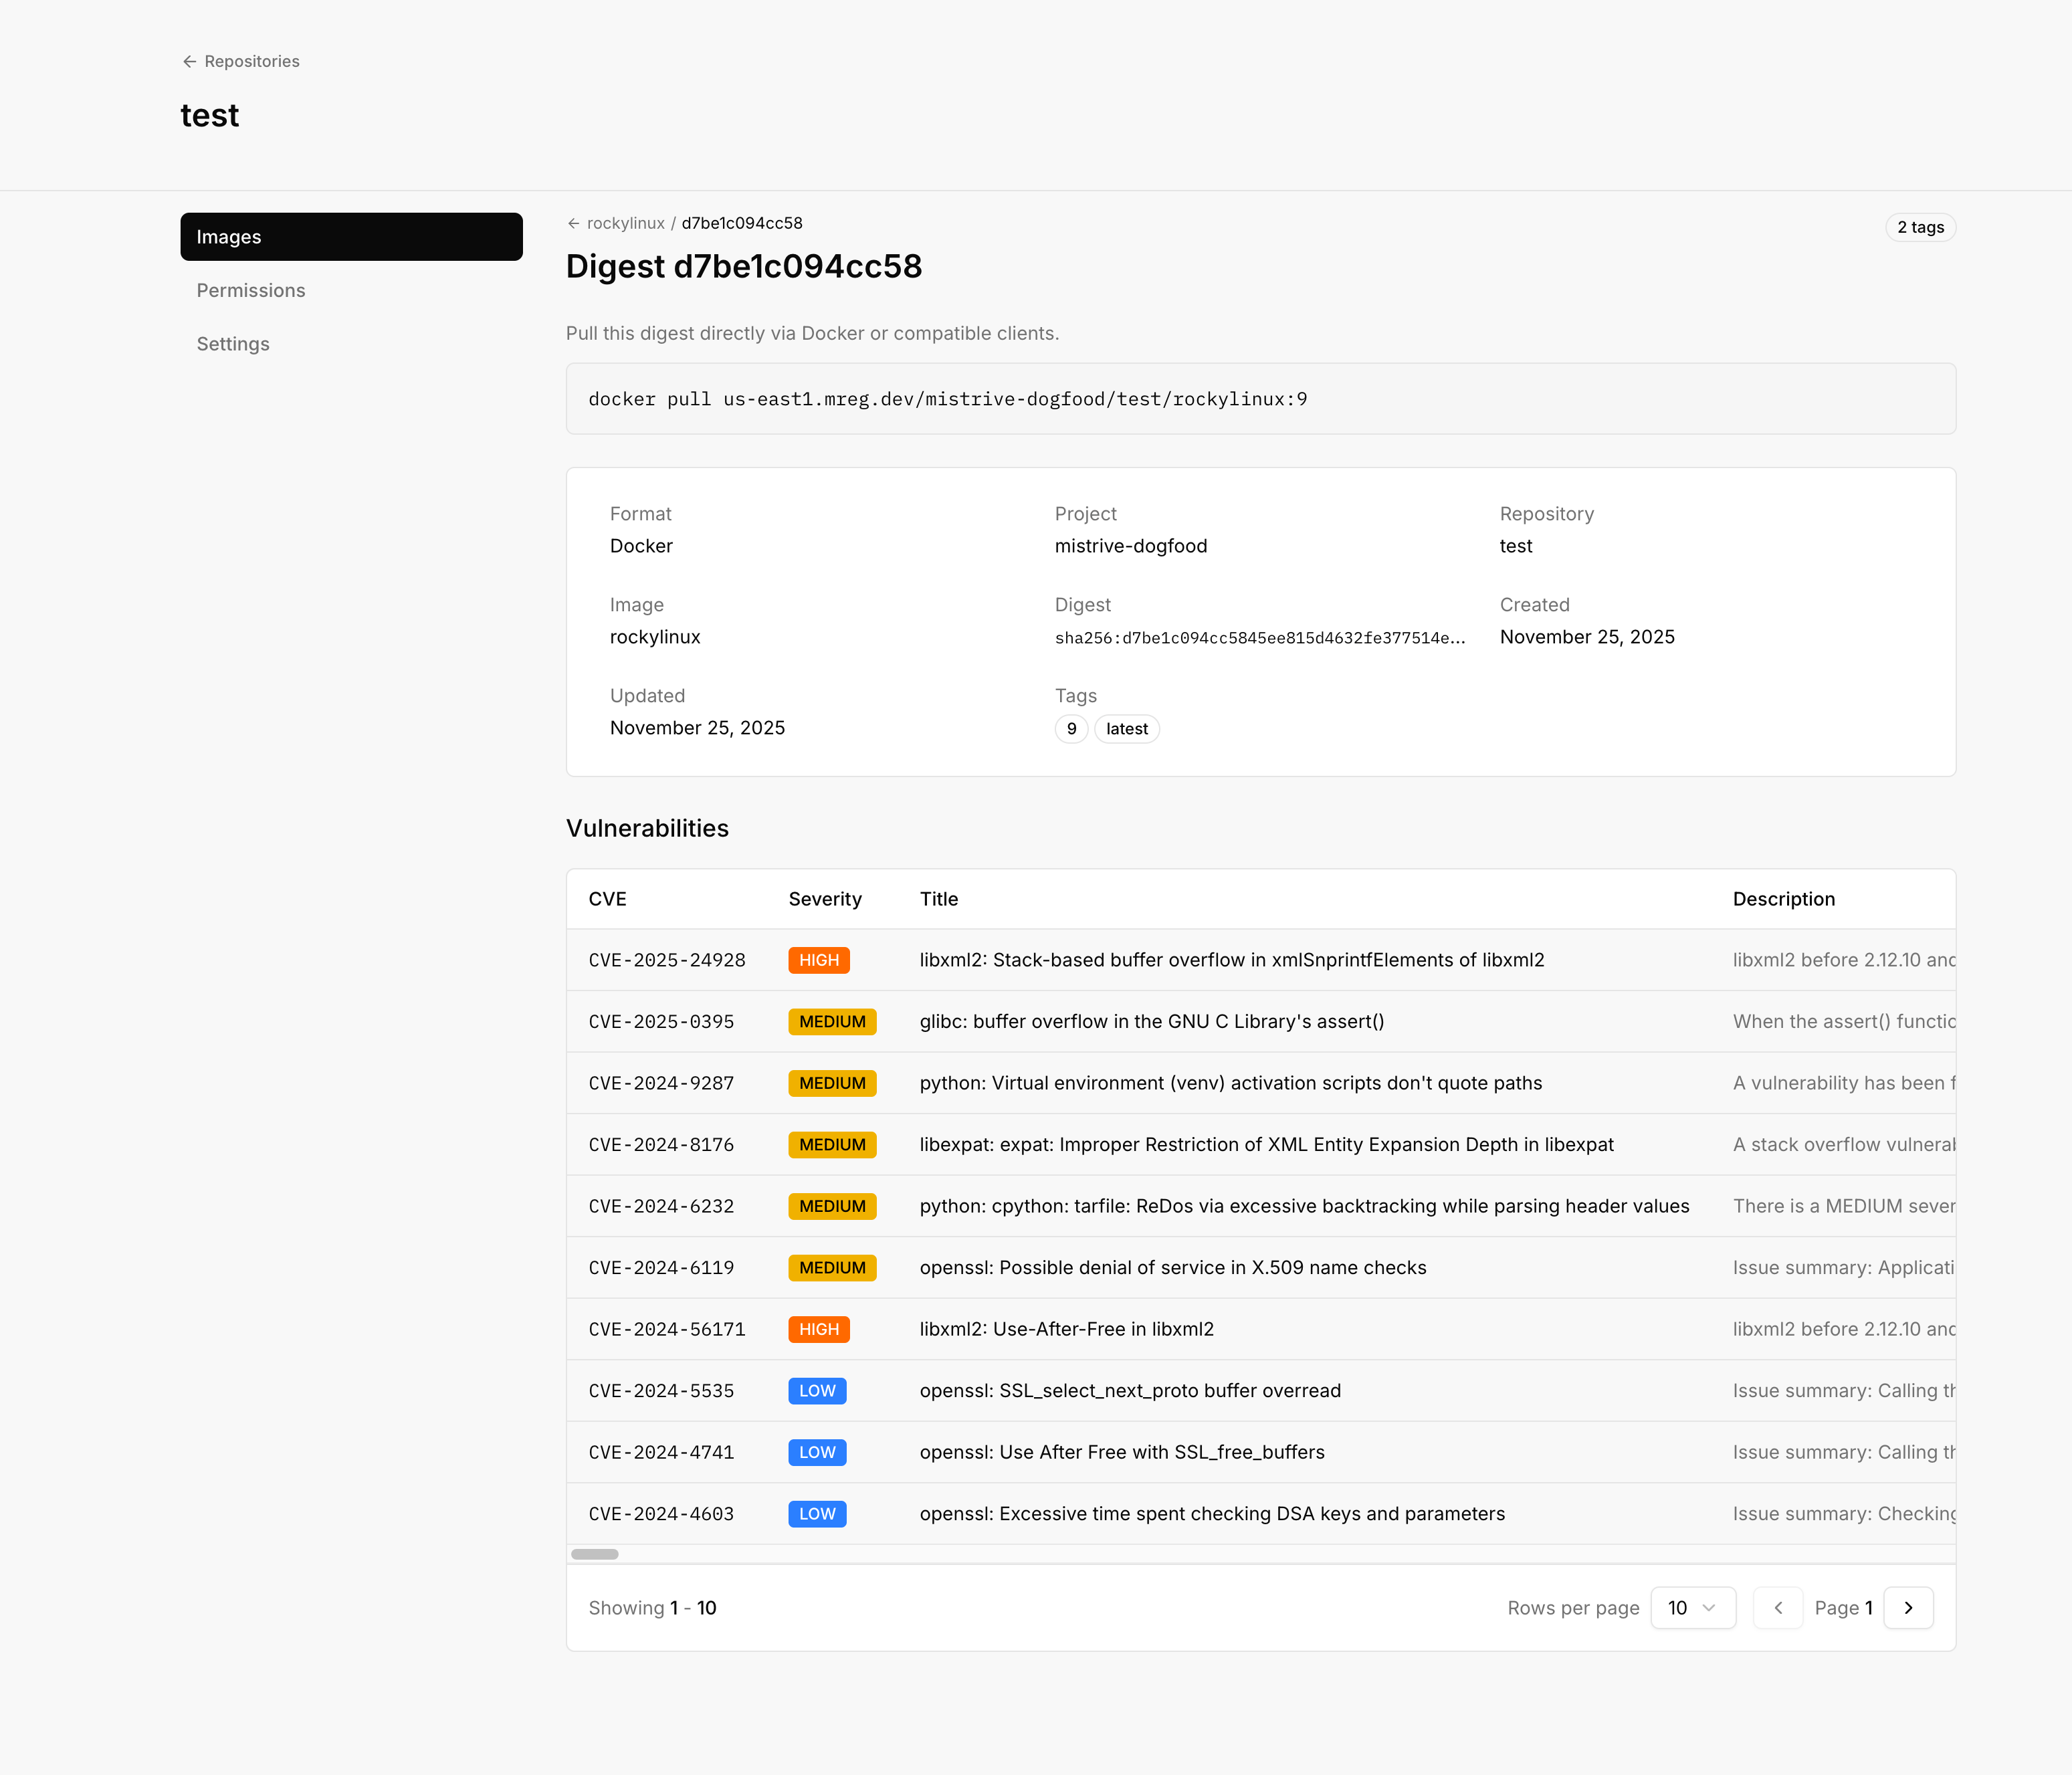
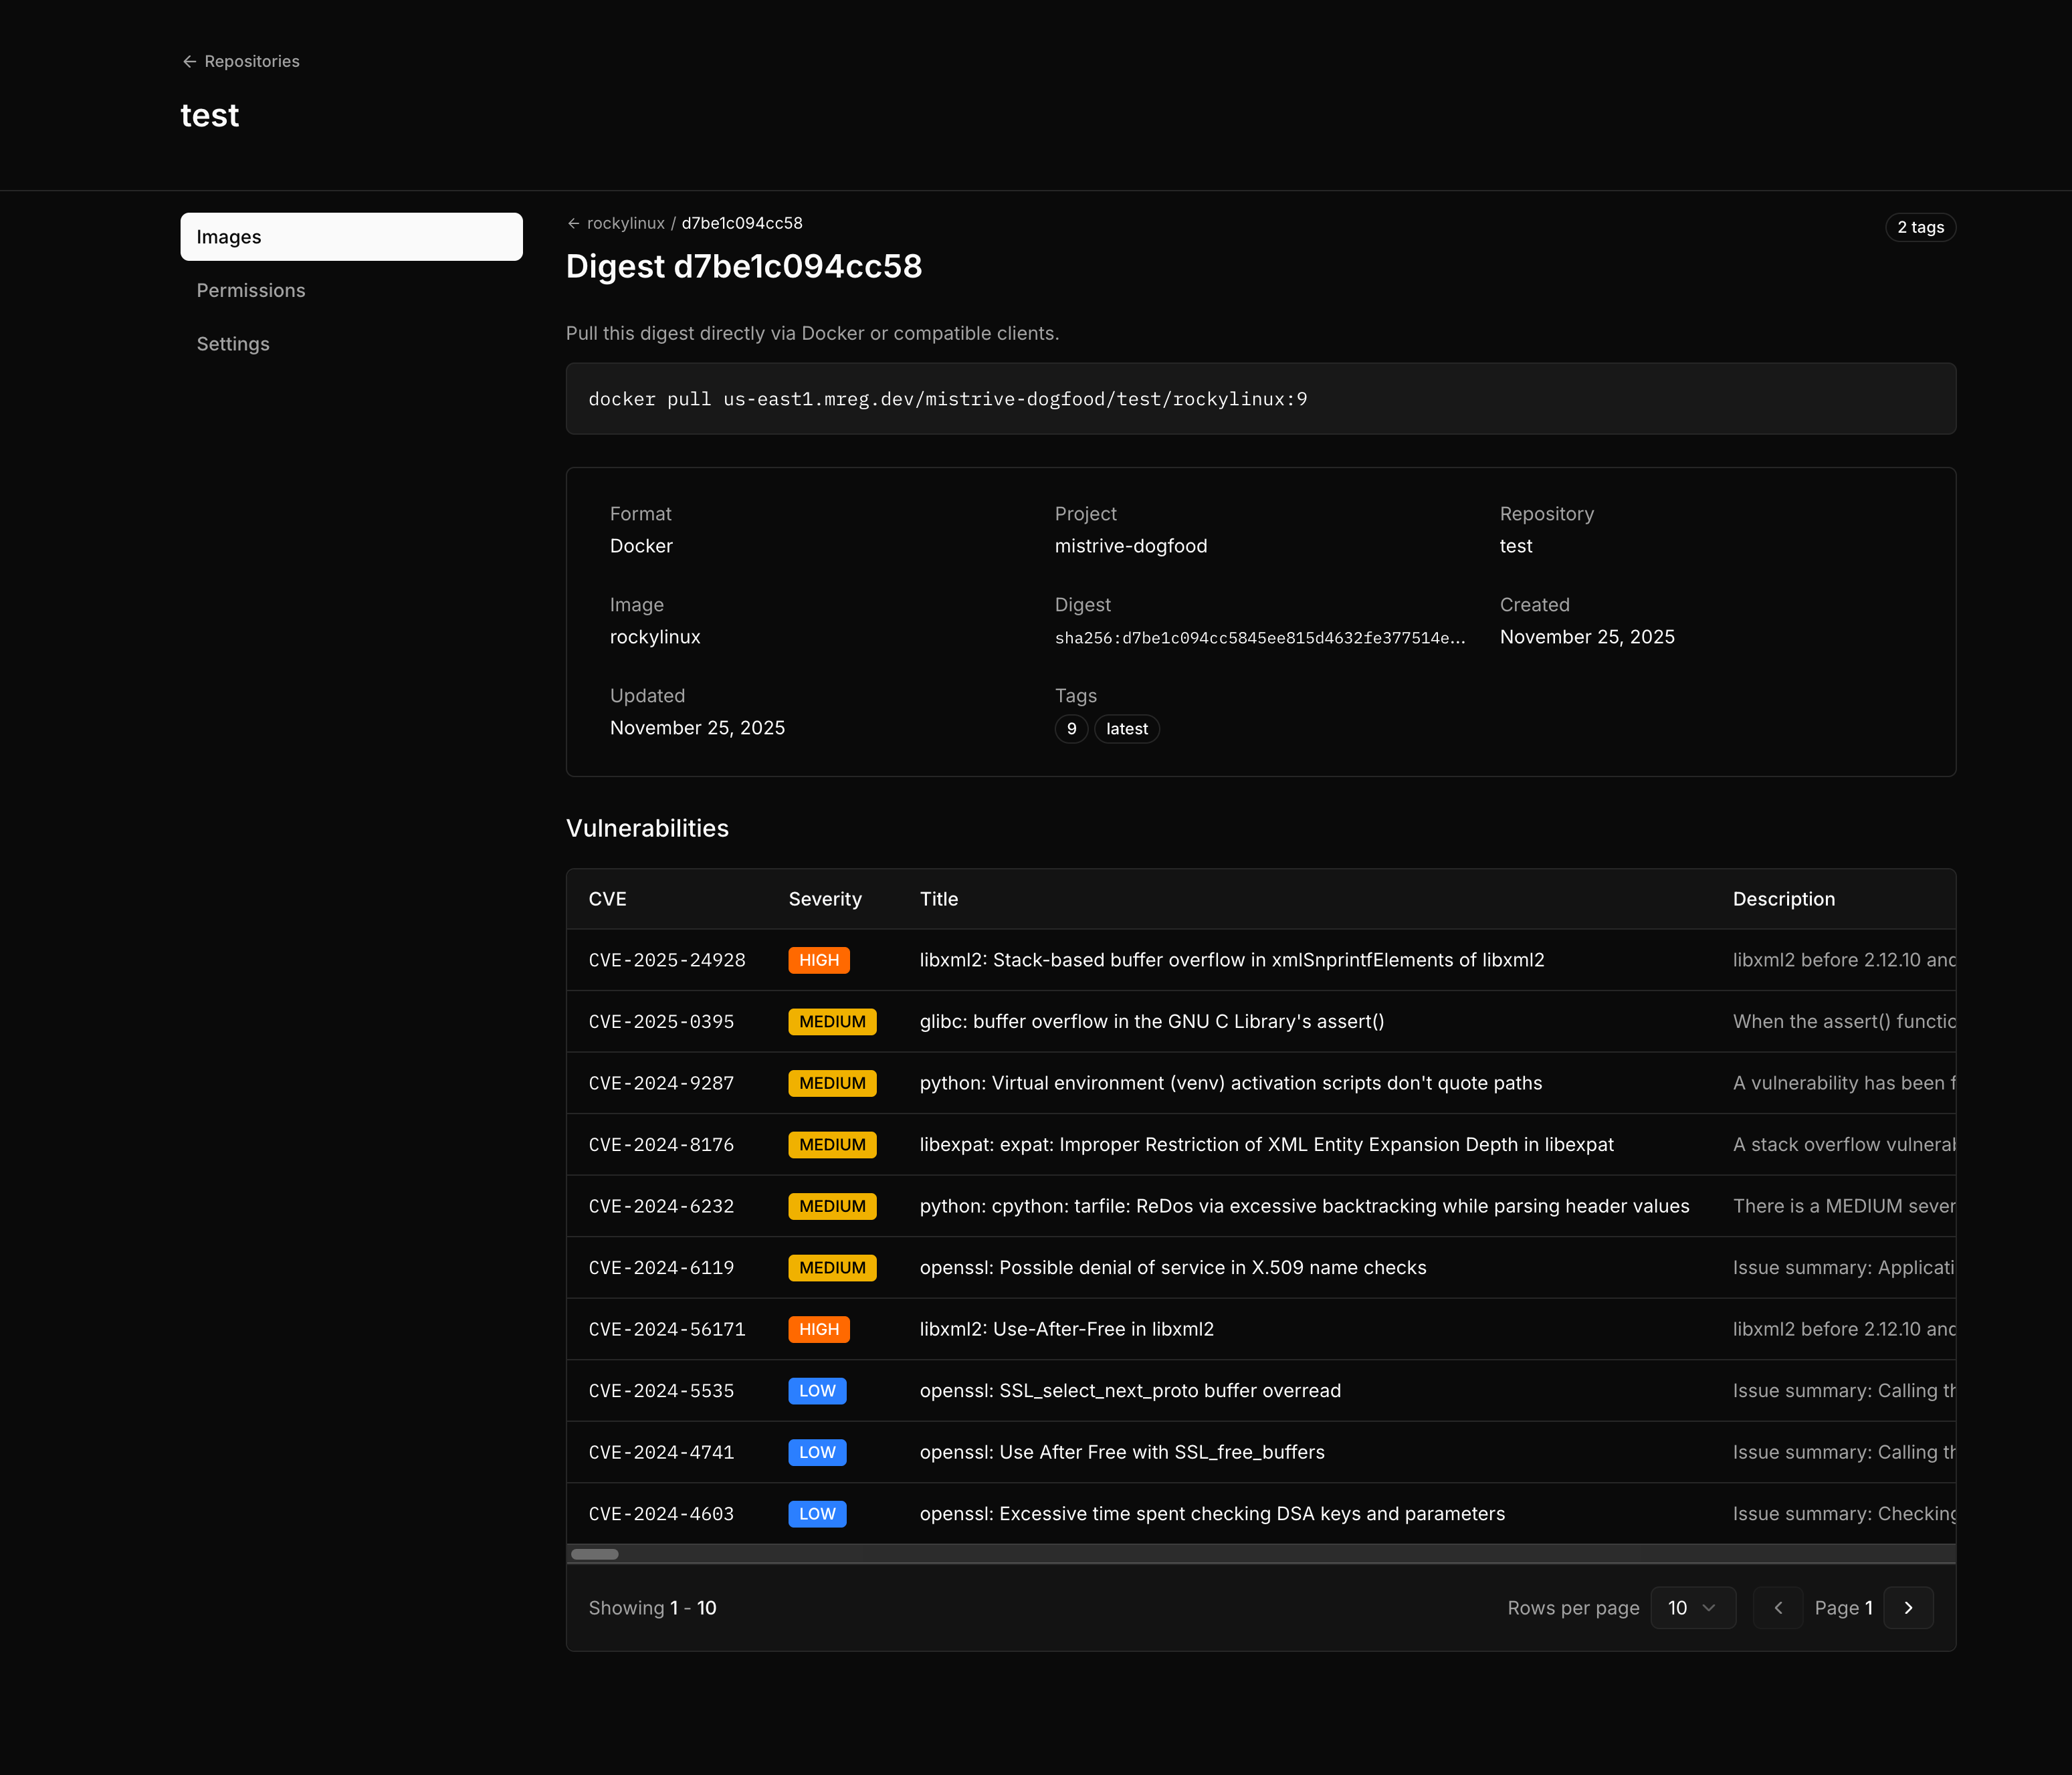
Each vulnerability entry includes the CVE identifier, title, and description.
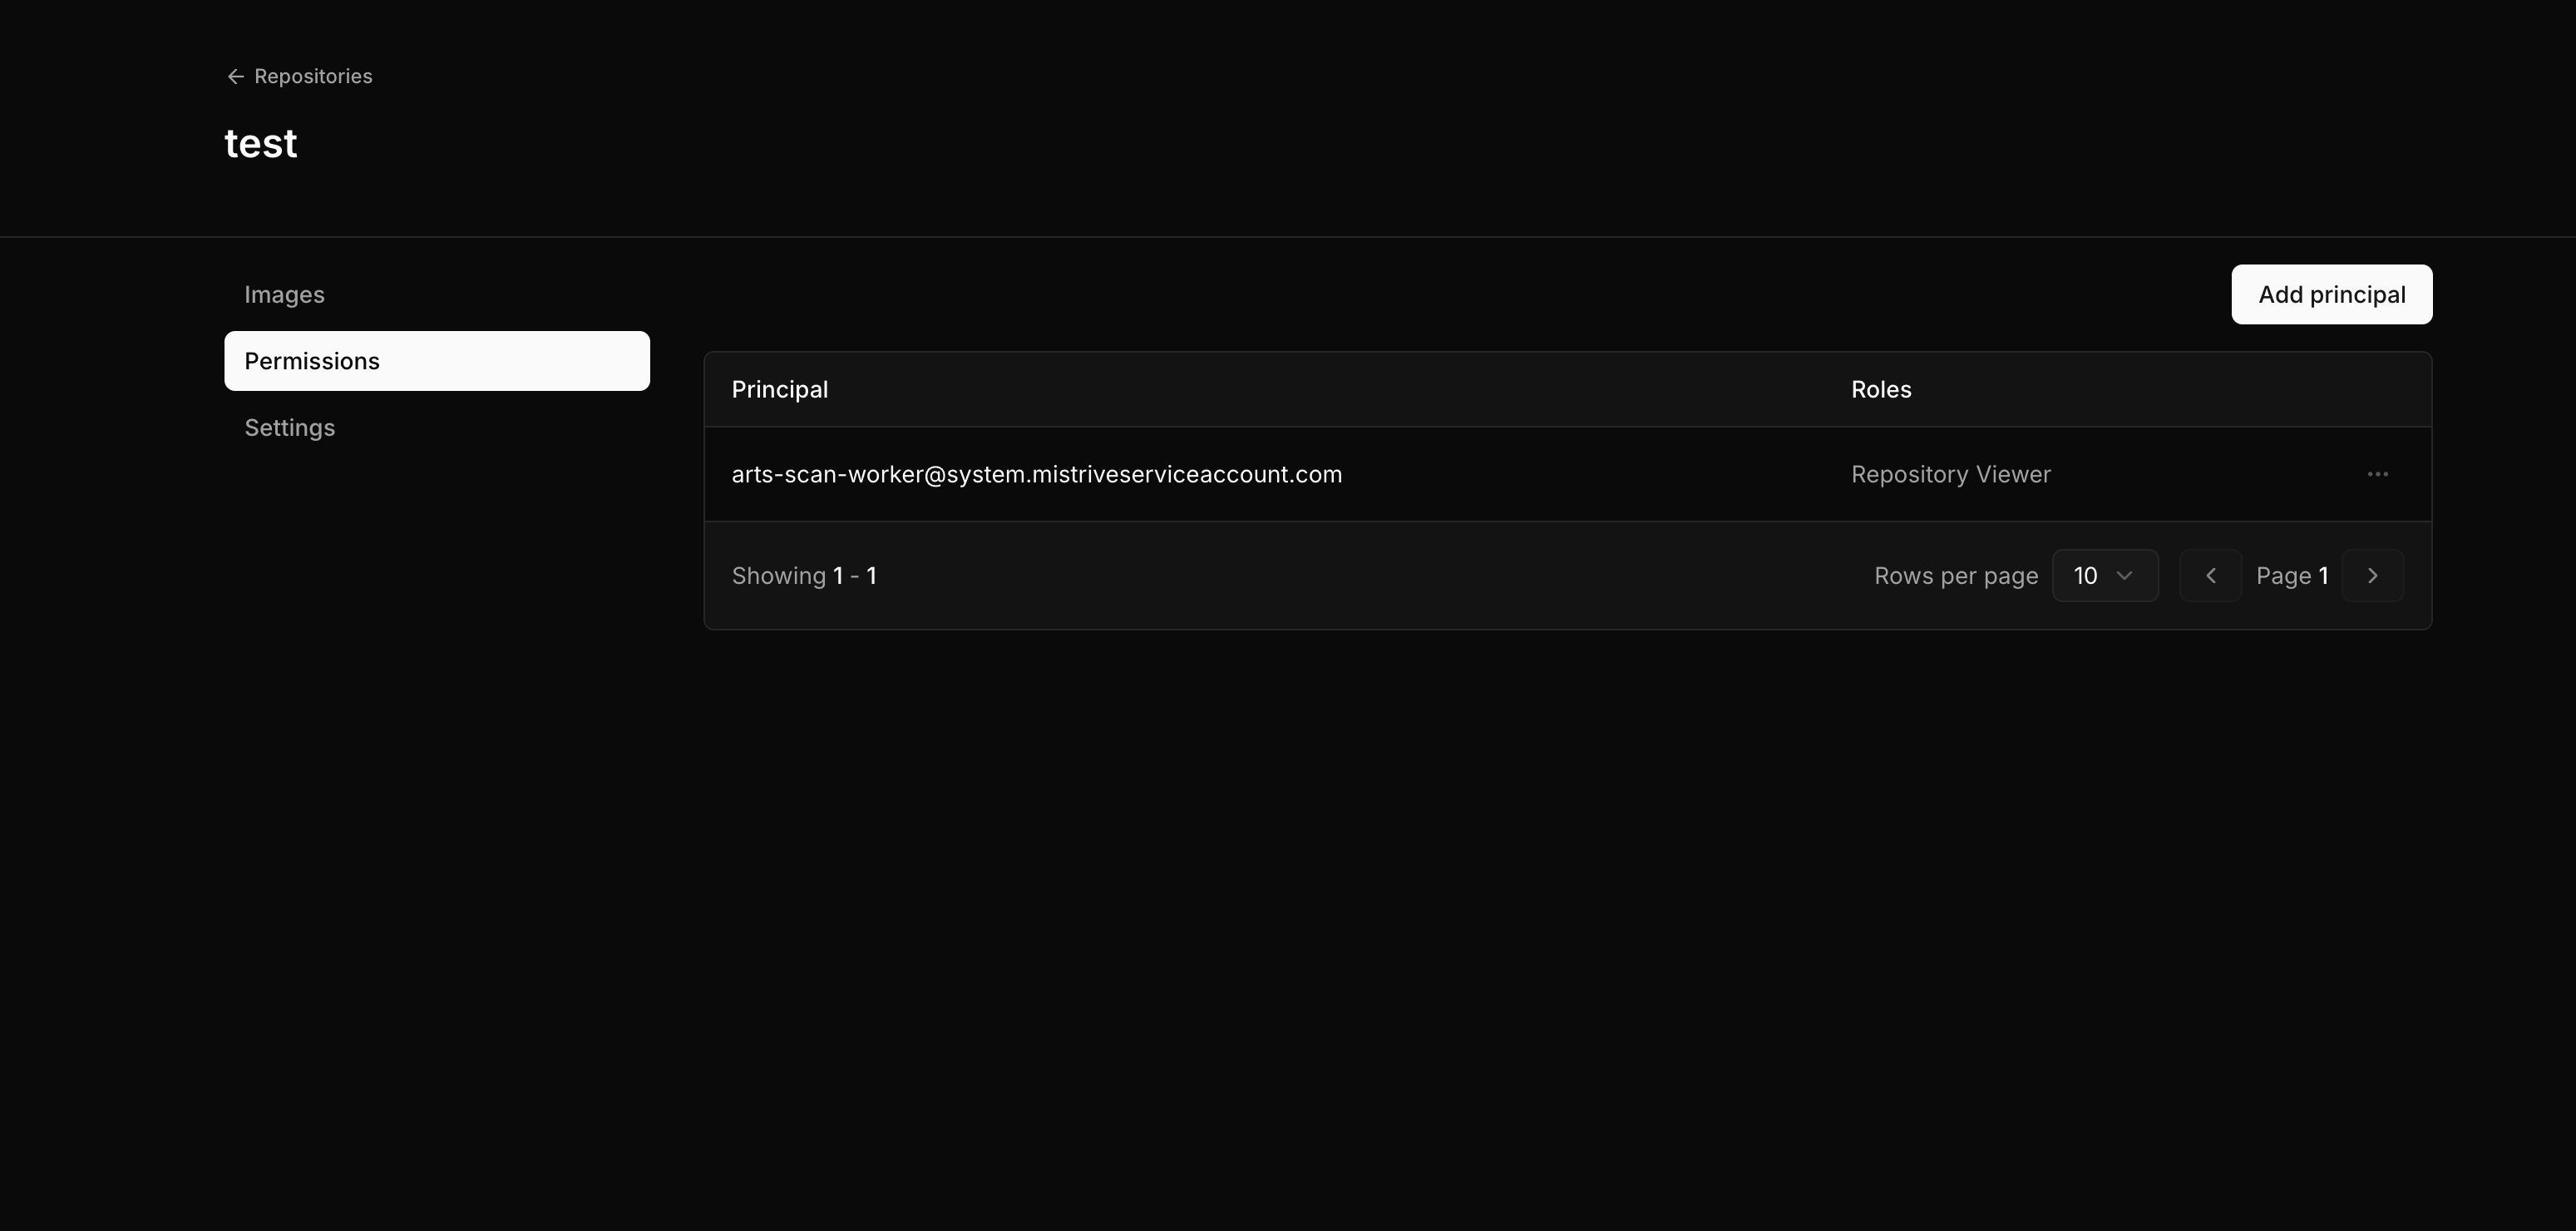
Managing permissions
Repository permissions control who can view, push, or manage images. Permissions can be granted to specific users, service accounts, or special principals. Navigate to your repository and open the Permissions tab.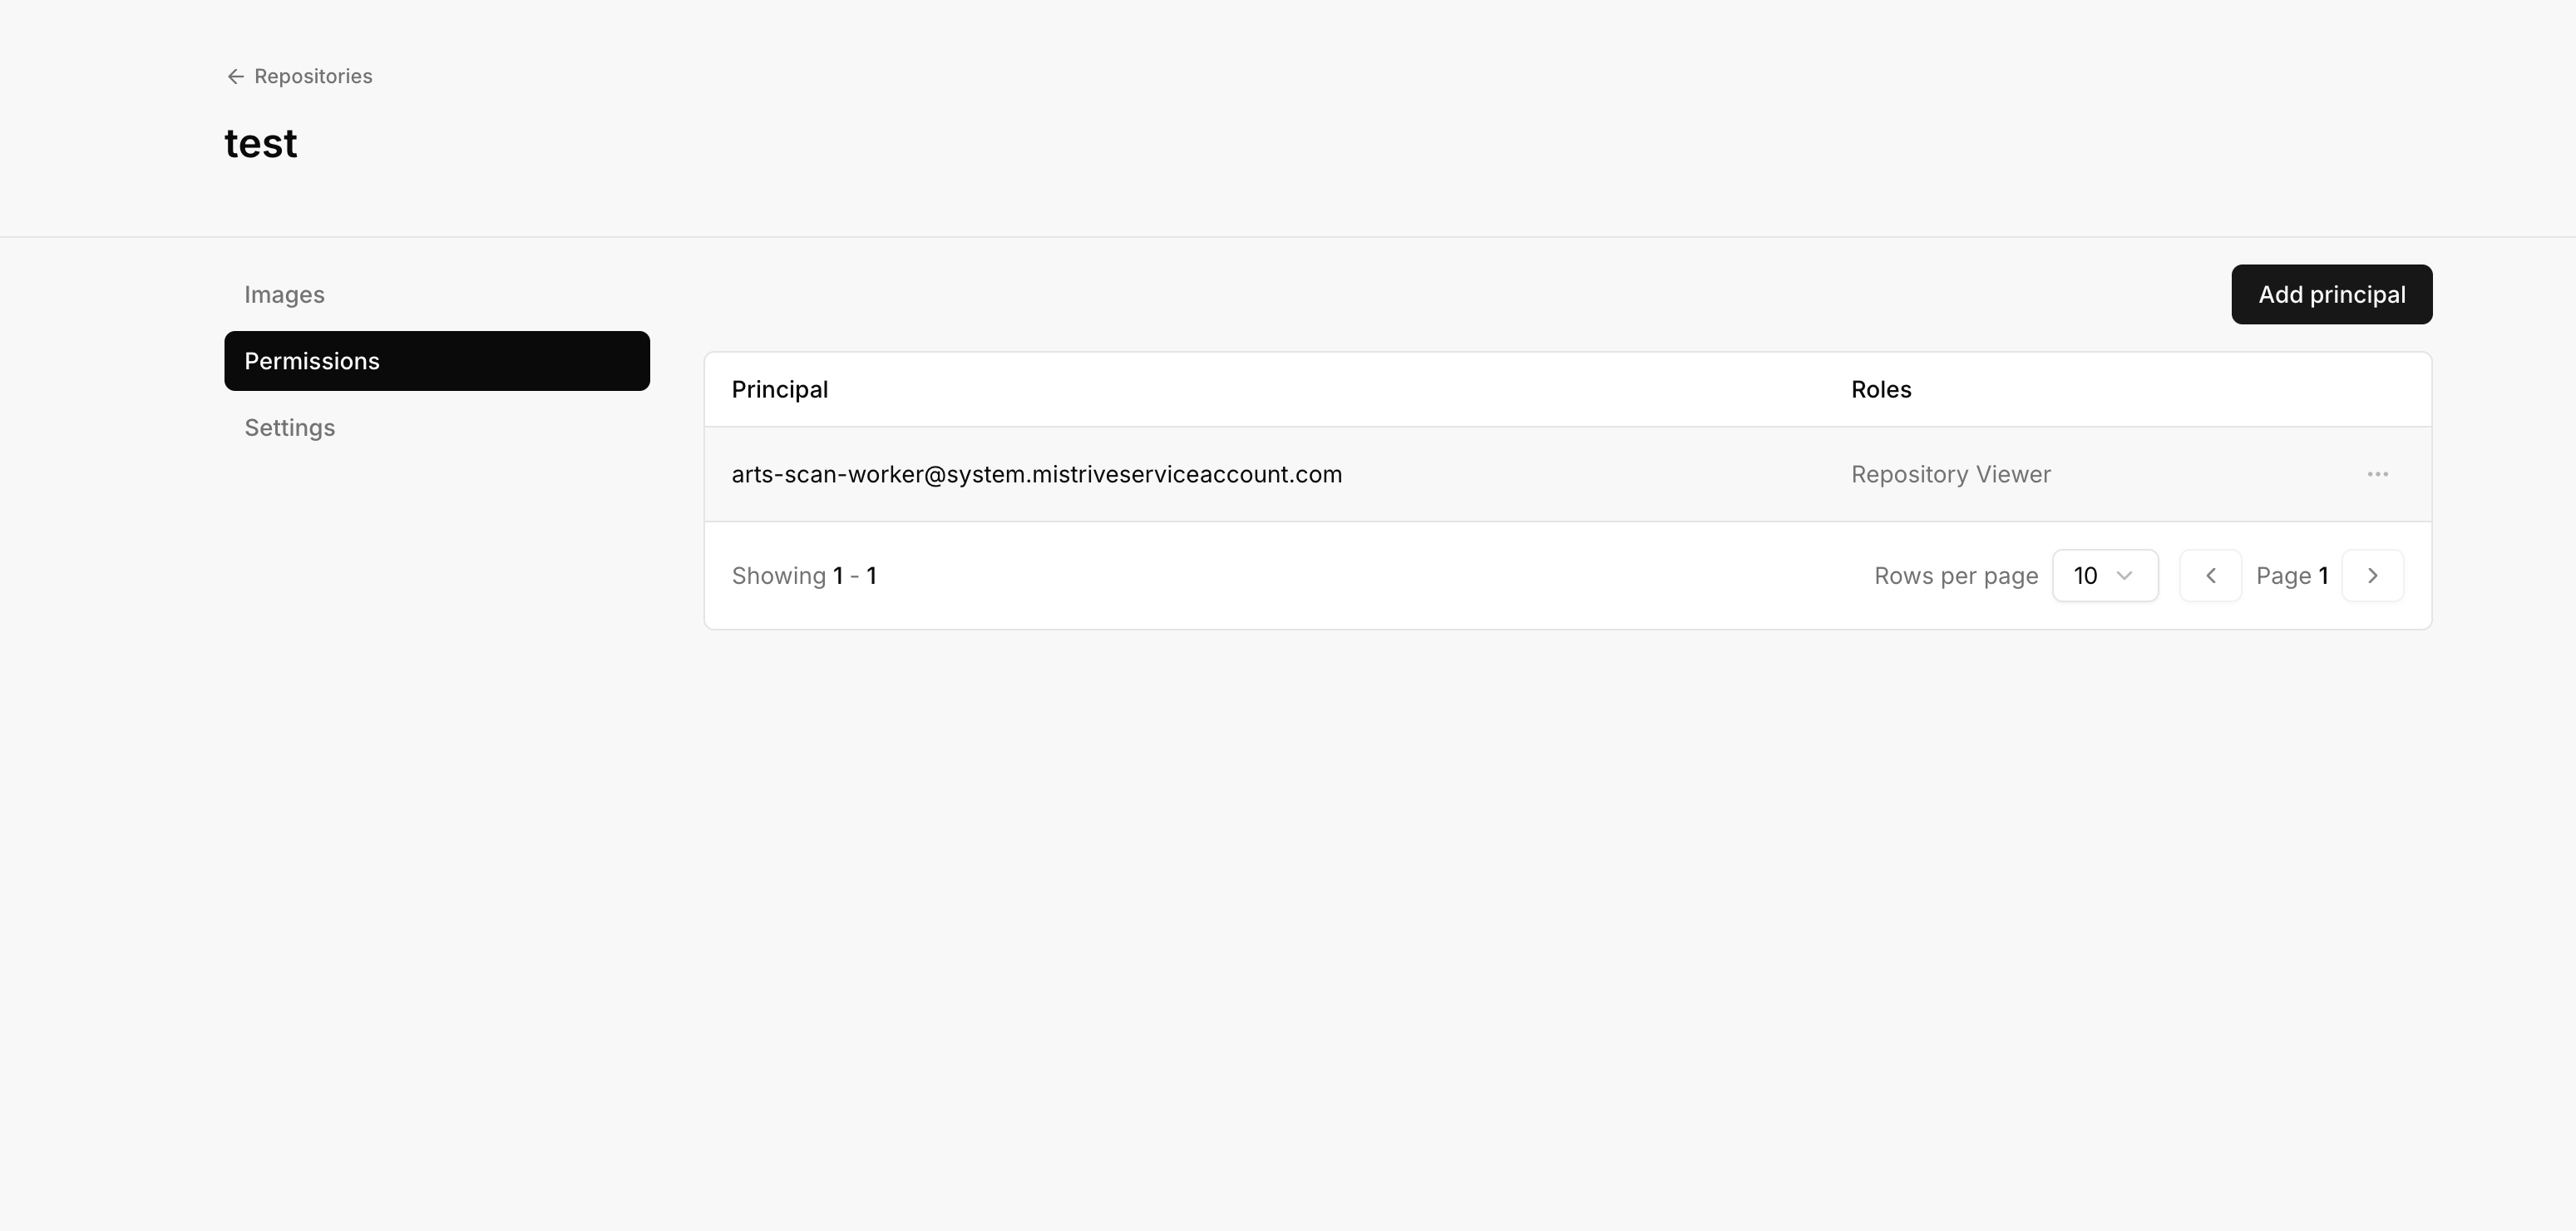
Repository roles
Adding a principal
1
Select Add Principal
Open the permission management interface.
2
Enter the principal identifier
Use an email address for users, a service account identifier, or a special principal.
3
Select a role
Choose Viewer, Editor, or Owner based on the access level needed.
4
Save
The principal can now access the repository according to their role.
Special principals
The Artifact Store supports two special principals for public or semi-public access:Permission inheritance
Repository permissions inherit from the project hierarchy:- A principal with Artifact Store Viewer on the project can pull from all repositories
- A principal with Artifact Store Editor on the project can push to all repositories
- A principal with Artifact Store Owner on the project can manage all repositories
What’s next
With your repository configured:- Set up Docker authentication to push and pull images
- Review permission inheritance to understand access control